This article is part of a series.
Prev: «Node.js in 2020
Node.js is a simple tool, but setting it up involves a lot of ceremony. Let’s learn how to make it work properly.
Getting Started
Note that the tools used in this project represent my opinions, I don’t claim that any of these are better than some other tool
X.
If you’re reading this, chances are that you want to create a Node project but you’re not sure where to start. I have some good news
for you! It is as simple as executing npm init. Getting to that point when we can do that is a bit more elaborate though. Let’s take a look at what tooling we’ll use to achieve this.
Tooling
npm (short for Node Package Manager) is a tool that can be used to manage your project, its dependencies, and many more things. Npm has an alternative called yarn that works a little bit differently. You can use any of those two but in this article series we’ll use npm because I come from an enterprise background and I prefer older and more battle tested tools compared to new and shiny tools.
When Node is installed it also installs npm for us so we don’t have to install it by hand. There is a catch though. Different projects might work with different versions of Node so we’re better off by using a tool that handles Node installations for us.
Luckily for us there is Volta that does this. Let’s install it now by executing the following command:
In this article series we’ll use Linux/Unix terminal commands that should work both on macOS and Linux. If you’re on Windows I’d suggest giving WSL a go. In fact I’m using WSL too!
curl https://get.volta.sh | bash
After reopening the terminal all we need to do to have a working Node environment is to ask volta to install it for us:
volta install node
Now we can verify that we have Node installed by running this command:
node --version
At the time of writing it will output v14.15.1.
Now we’re all set, right? Well, not quite.
The IDE
We have many options to choose from when we’re looking for a good IDE. There is Webstorm, VS Code, Sublime Text, and many more. We’re going to use Visual Studio Code. The reasons are simple: VS Code is lightning fast, easy to use and it is fully featured. Installing it is also very simple, you just download the version you like from their website.
A note on WSL: VS Code fully supports WSL, so if you’re using it all you need to do is to install the
Remote - WSLplugin and you’re all set. In this case you’ll have to do “Reopen project in WSL” when you want to use this feature
Once you have VS Code installed you’ll also need to install a few plugins. All of this will be useful later:
- Remote - WSL (optional, for WSL users only)
- Node.js Extension Pack: Node.js goodies
- Prettier - Code Formatter: Code formatter to be ued
- ESLint: Javascript linting tool
Now we have everything in place to start coding!
Creating a Project
Let’s initialize our project by running:
npm init -y
The
-yswitch will just say “yes” to all the questionsnpm initwill ask. Try it out without-yif you’re curious.
This created a file called package.json with some default settings. It should look like this:
package.jsonis very similar topom.xmlorbuild.gradleif you’re coming from the Java world.
{
  "name": "node-with-react-js",
  "version": "1.0.0",
  "description": "Example project for setting up Node.js",
  "main": "index.js",
  "scripts": {
    "test": "echo \"Error: no test specified\" && exit 1"
  },
  "repository": {
    "type": "git",
    "url": "git+https://github.com/vibitect/node-with-react-js.git"
  },
  "keywords": [],
  "author": "",
  "license": "ISC",
  "bugs": {
    "url": "https://github.com/vibitect/node-with-react-js/issues"
  },
  "homepage": "https://github.com/vibitect/node-with-react-js#readme"
}
npm init is intelligent enough to figure out some of those values from the .git directory if you have that. For me some values are pre-filled (like name and description).
We’ll take a look at each of those options as we go forward with our project.
Now let’s open this project in VS Code. It isn’t doing much yet, but it comes with a script (in the scripts section) for
testing.
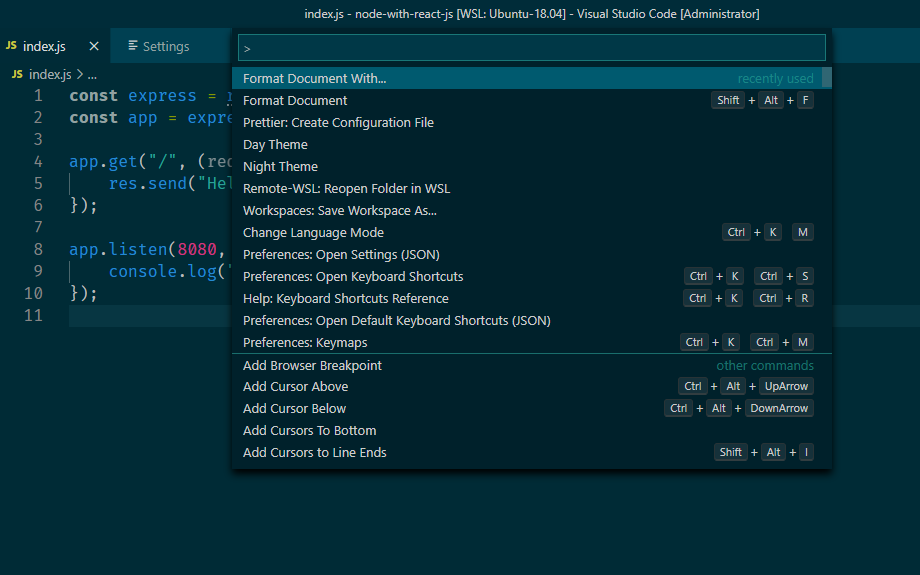
Note that you can open a terminal in VS Code as well. What I usually do when I’m looking for a command VS Code might support is to press Ctrl+Alt+P. It will open a search dialog like this, and I can look for commands. It also displays the key combination that belongs to the command:
Let’s try to run the script in package.json now:
npm run test
Don’t forget to use “Reopen folder in WSL” if you’re running on WSL.
This will output a rather verbose error log with this in it:
Error: no test specified
That’s right. scripts contains key-value pairs where the key is the name of the function you want to run and the value is just a simple bash script. You can run these commands by using npm run <command_name>.
Note that you can also use environmental variables in your commands.
Running Node
Now that we have a project we can add some code to it. What about running a server first? Create a file with the name index.js and
add this code to it:
const express = require("express");
const app = express();

app.get("/", (req, res) => {
  res.send("Hello, World!");
});

app.listen(8080, () => {
  console.log("server started on port 8080");
});
In order to be able to start this we just need to add the corresponding script to the scripts section in package.json:
"start": "npx run index.js"
“What the heck is
npx”, you might ask? Well, it is a tool that can run the npm packages we installed locally. This helps with encapsulation as we won’t depend on packages that are installed globally and our project will be resilient to changes in the environment.
Now run it with npm run start. Let’s look at what happens…
Error: Cannot find module 'express'
Require stack:
- /f/dev/projects/node-with-react-js/index.js
    at Function.Module._resolveFilename (internal/modules/cjs/loader.js:880:15)
    at Function.Module._load (internal/modules/cjs/loader.js:725:27)
    at Module.require (internal/modules/cjs/loader.js:952:19)
    at require (internal/modules/cjs/helpers.js:88:18)
    at Object.<anonymous> (/f/dev/projects/node-with-react-js/index.js:1:17)
    at Module._compile (internal/modules/cjs/loader.js:1063:30)
    at Object.Module._extensions..js (internal/modules/cjs/loader.js:1092:10)
    at Module.load (internal/modules/cjs/loader.js:928:32)
    at Function.Module._load (internal/modules/cjs/loader.js:769:14)
    at Function.executeUserEntryPoint [as runMain] (internal/modules/run_main.js:72:12) {
  code: 'MODULE_NOT_FOUND',
  requireStack: [ '/f/dev/projects/node-with-react-js/index.js' ]
}
Oops. It says express is not found. Why? This happens because we didn’t add it to our package.json file. In a Node project we can only use code we downloaded. Let’s install the necessary packages now:
npm install express
Express.js is a minimalist web framework we’ll use throughout this article series.
What happens after running this is that the package.json is modified to include the new dependency:
"dependencies": {
  "express": "^4.17.1"
}
and it is also downloaded to the node_modules folder. node_modules is similar to target or build in Java: it includes the packages that are downloaded through npm. Note that node_modules should be added to .gitignore as it contains a lot of data that might change when we change our dependencies. If someone checks your project out they can run npm install to download all the dependencies to their node_modules folder.
Now let’s try running npm again:
npm run start
Now if we navigate to http://localhost:8080/ we’ll see the Hello, World! as expected.
Congratulations!
Hot Code Replace
Since we’re using Javascript we can expect it to be reloaded as we change the code, right? For this there is a tool called nodemon, so let’s install it now:
npm install nodemon
Now we can add a new script for development:
"dev": "npx nodemon index.js"
Now if we run npm run dev, changing the code will result in a quick server restart. Yay!
Formatting and Linting
For any project that’s going to be run in a production environment and more than one person will work on it code formatting and linting are pretty much mandatory.
Formatting is important because with it, one can avoid conflicts due to different coding styles. With linting we can avoid (some) problems because of code quality. Let’s see how we can configure these. Let’s install prettier and eslint:
npm install -D prettier eslint eslint-config-prettier
The eagle-eyed might have noticed the
-Dflag. this means that the tools above are installed as a development time dependency. This means that whenever we choose to create a production build we won’t include these.
After installing is done we’ll see the following in package.json:
"devDependencies": {
  "eslint": "^7.14.0",
  "eslint-config-prettier": "^6.15.0",
  "prettier": "^2.2.0"
}
Now let’s configure them. Let’s start with requiring a Prettier config to be present. We can do this by going to the settings (Ctrl + , by default) and ticking the checkbox in: Prettier: Require Config.
From now on the formatting plugin in VS Code will only work if we have it configured. Let’s do that now. Create a .prettierrc file in the root directory with the following config values:
{
  "trailingComma": "es5",
  "tabWidth": 4,
  "semi": true,
  "singleQuote": false
}
Troubleshooting Prettier
It might happen that formatting won’t work for you out of the box. In this case you can try these:
- Uninstall any other formatter tools you installed previously
- Check the settings of Prettier. It might have been disabled, or you might be using a wrong file.
- It is possible that Prettier is not the default formatter! Try running Prettier with “Format Document With…”. You can also choose the default formatter there.
- You can also read the official docs here.
Good. Now we have a working formatter that we can use to keep our code tidy. Now on to eslint…
Setting Up ESLint
ESLint is a linting tool for Javascript and it also requires a config file, so let’s initialize it now by using the eslint tool we installed:
npx eslint --init
This will result in a dialog with some questions. Let’s choose:
- How would you like to use ESLint? -> To check syntax and find problems
- What type of modules does your project use? -> Javascript Modules (import/export)
- Which framework does your project use? -> None of these
- Does your project use TypeScript? -> No
- Where does your code run? -> Select both
- What format do you want your config file to be in? -> JSON
This will create the following file:
{
    "env": {                          // 1
        "browser": true,
        "es2021": true,
        "node": true
    },
    "extends": "eslint:recommended",  // 2
    "parserOptions": {                // 3
        "ecmaVersion": 12,            // 4
        "sourceType": "module"        // 5
    },
    "rules": {                        // 6
    }
}
What this does is:
- This section specifies what environments we’ll use. In our case it will enable env variables for the browser, node and es2021.
- This enables the recommended settings for ESLint. What this means in short is that all rules will be applied that have a wrench next to them in this list.
- These are the options for the ESLint parser. Read more on this topic here.
- We’re telling ESLint which ECMA version to use
- And here we’re telling it to use ES6 modules. We’ll talk about this in a jiffy.
- These are the rules that are explicitly enabled. You can read more about them here.
What we need to modify in this is to add prettier to the mix. We already installed the Prettier + ESLint integration plugin before so now we need to add it. The "extends" part also accepts an array so let’s refactor it a bit:
"extends": ["eslint:recommended", "prettier"],
Make sure that "prettier" is the last in this list as we want the post processing to take place properly. This is also outlined in the official docs for the integration.
Good job! We’ve configured our project with a linter and a formatter as well!
Using Babel
As I’ve mentioned in the previous article most upgrades Javascript received would be pointless if we couldn’t use them in our code. This is most important in the browser, but Node also has some problems. One of them is the module system. If you ever used ES6 modules you’re going to miss them when you’re on the Node platform, so let’s make it work now!
In order for this to work we’re going to need Babel. It is a Javascript compiler that we can use it to convert our
shiny ESNext code into old and boring Javascript code that can run in the browser without compatibility issues, or on Node without forcing us to use require.
Configuring Babel is pretty simple. First, we need to install some packages:
npm install -D @babel/core @babel/preset-env @babel/cli @babel/eslint-parser
Note that these are all dev dependencies, as we won’t need Babel in our production code.
Let’s see what these packages are:
@babel/corecontains Babel’s API@babel/preset-envis a smart preset that allows you to use the latest JavaScript without needing to micromanage which syntax transforms are needed by your target environment(s). This both makes your life easier and JavaScript bundles smaller!@babel/cliis a CLI package for Babel@babel/eslint-parseris there for ESLint compatibility
The little
@before the package’s name means that it is part of a namespace. In our case the namespace isbabel
Now we need to add some configuration to enable Babel. Let’s create a .babelrc file:
{
    "presets": [
        [
            "@babel/env",
            {
                "targets": {
                    "node": "current"
                }
            }
        ]
    ]
}
This will intelligently figure out what should be enabled (more here) and luckily for us this includes ES6 modules.
Next we need to tell ESLint that we’re using Babel instead of ESLint’s own compiler. Add this to .eslintrc.json
parser: "babel-eslint",
We’ve set Babel up, but we still don’t use it. For this we’ll have to modify our workflow a bit by introducing a new folder
where we’ll build our project. For this we’ll use rimraf as well. Rimraf can be used to delete our old dist folder before
building again. Now install Rimraf:
npm install rimraf
and replace the scripts section with our new scripts:
"scripts": {
    "build": "babel src --out-dir dist --source-maps --copy-files",
    "dev": "nodemon --exec npm run restart",
    "restart": "rimraf dist && npm run build && npm run start",
    "start": "node dist/index.js"
},
and move index.js into the src folder.
Now if we run this Nodemon will end up in an endless loop, as it will restart after each Babel compilation, but Babel will run whenever the app is restarted! The solution for this is a Nodemon config. Create nodemon.json and put this in it:
{
    "restartable": "rs",
    "ignore": [".git", "node_modules/**/node_modules", "dist"],
    "verbose": true,
    "execMap": {
        "js": "node"
    },
    "runOnChangeOnly": false,
    "watch": ["src/**/*.js"],
    "ext": "js,json,css"
}
Now we can modify the import in our index.js from const express = require("express"); to import { express } from "express";!
Conclusion
We’ve seen that setting up a new Node app comes with some ceremony, but we ended up with a project that has everything you might need to start working: formatting, linting, hot code replace and compilation!
In the next article we’ll take a look how to add a frontend project to the mix using React!
Until then, go forth and kode on!