This article is part of a series.
Prev: «How To Make a Roguelike: #2 Views, Screens, Inputs Next: How To Make a Roguelike: #4 The Player »
Now, that we have set up our Views it is time to start using the
GameAreaand generate caves which the player can explore!
Cleaning up Our PlayView
We have already used components in the previous article but now we’re gonna design an UI for our game before we start generating our game world, so let’s get started!
First of all let’s remove the winButton and the loseButton from our PlayView. It was fun while it
lasted but now we want to get some serious work done:
import org.hexworks.zircon.api.ColorThemes
import org.hexworks.zircon.api.grid.TileGrid
import org.hexworks.zircon.api.view.base.BaseView

class PlayView(
    private val grid: TileGrid
) : BaseView(grid, ColorThemes.arc()) {

    init {

    }
}
If you take a look at our Views you’ll see that we set a theme in all of them by hand so it is time to move
this into our own config file. We’ll also configure some other things while we’re at it:
package com.example.cavesofzircon

import org.hexworks.zircon.api.CP437TilesetResources
import org.hexworks.zircon.api.ColorThemes
import org.hexworks.zircon.api.application.AppConfig
import org.hexworks.zircon.api.data.Size3D

object GameConfig {

    // game
    const val DUNGEON_LEVELS = 2                        // 1

    // look & feel
    val TILESET = CP437TilesetResources.rogueYun16x16() // 2
    val THEME = ColorThemes.zenburnVanilla()            // 3
    const val SIDEBAR_WIDTH = 18
    const val LOG_AREA_HEIGHT = 8                       // 4

    // sizing
    const val WINDOW_WIDTH = 80
    const val WINDOW_HEIGHT = 50

    val WORLD_SIZE = Size3D.create(WINDOW_WIDTH, WINDOW_HEIGHT, DUNGEON_LEVELS)
    val GAME_AREA_SIZE = Size3D.create(
        xLength = WINDOW_WIDTH - SIDEBAR_WIDTH,
        yLength = WINDOW_HEIGHT - LOG_AREA_HEIGHT,
        zLength = DUNGEON_LEVELS
    )

    fun buildAppConfig() = AppConfig.newBuilder()       // 5
        .withDefaultTileset(TILESET)
        .withSize(WINDOW_WIDTH, WINDOW_HEIGHT)
        .build()

}
Hey, aren’t globals bad? Well, shared mutable state is bad, but in this config file everything is immutable, so it can’t cause problems for us. We could have used a
jsonfile or something similar instead, but we’ll keep this for simplicity’s sake.
So what happens here is that we:
- create a constant for the number of levels we’re gonna have in our dungeon
- choose a tileset which is better for the dungeon vibe we are trying to achieve
- pick a theme which has more eerie colors than the previous one
- configure the width of our sidebar and the height of our log area which we’ll add momentarily
- add a function which builds an
AppConfigfor us based on these settings. This can be used for building ourApplication
Now we just modify our main.kt a bit to use this new config:
package com.example.cavesofzircon

import com.example.cavesofzircon.view.StartView
import org.hexworks.zircon.api.SwingApplications

fun main(args: Array<String>) {
    val grid = SwingApplications.startTileGrid(GameConfig.buildAppConfig())
    StartView(grid).dock()
}
One more thing we can do is to make our views accept the theme as a constructor parameter as well. We hardcoded the theme previously which was fine, but now that we have this in a global config file it is better to use that. This is where default parameter values come into the picture:
import com.example.cavesofzircon.GameConfig
import org.hexworks.zircon.api.component.ColorTheme
import org.hexworks.zircon.api.grid.TileGrid
import org.hexworks.zircon.api.view.base.BaseView

class PlayView(
    private val grid: TileGrid,
    theme: ColorTheme = GameConfig.THEME
) : BaseView(grid, theme) {

    init {

    }
}
What happens here is that we take the theme as a constructor parameter, but if it is not supplied it will use GameConfig.THEME as a default. This is a very common pattern in Kotlin and we also avoided a compiler error when we added the parameter by using a default value.
Now all is left to do is to add the main UI components to our PlayView.
Using Panels
Panel is a Component which we can add to our Views and they can hold other Components. This means that
if we add a bunch of Buttons and other controls to a Panel and move the Panel around, its child controls
will move with it!
Let’s add a sidebar and our new theme to the PlayView now:
import com.example.cavesofzircon.GameConfig
import org.hexworks.zircon.api.ComponentDecorations.box
import org.hexworks.zircon.api.Components
import org.hexworks.zircon.api.component.ColorTheme
import org.hexworks.zircon.api.grid.TileGrid
import org.hexworks.zircon.api.view.base.BaseView

class PlayView(
    private val grid: TileGrid,
    theme: ColorTheme = GameConfig.THEME
) : BaseView(grid, theme) {

    init {
        val sidebar = Components.panel()
            .withSize(GameConfig.SIDEBAR_WIDTH, GameConfig.WINDOW_HEIGHT)
            .withDecorations(box())
            .build()

        screen.addComponent(sidebar)
    }
}
If you run it you’ll see something like this:
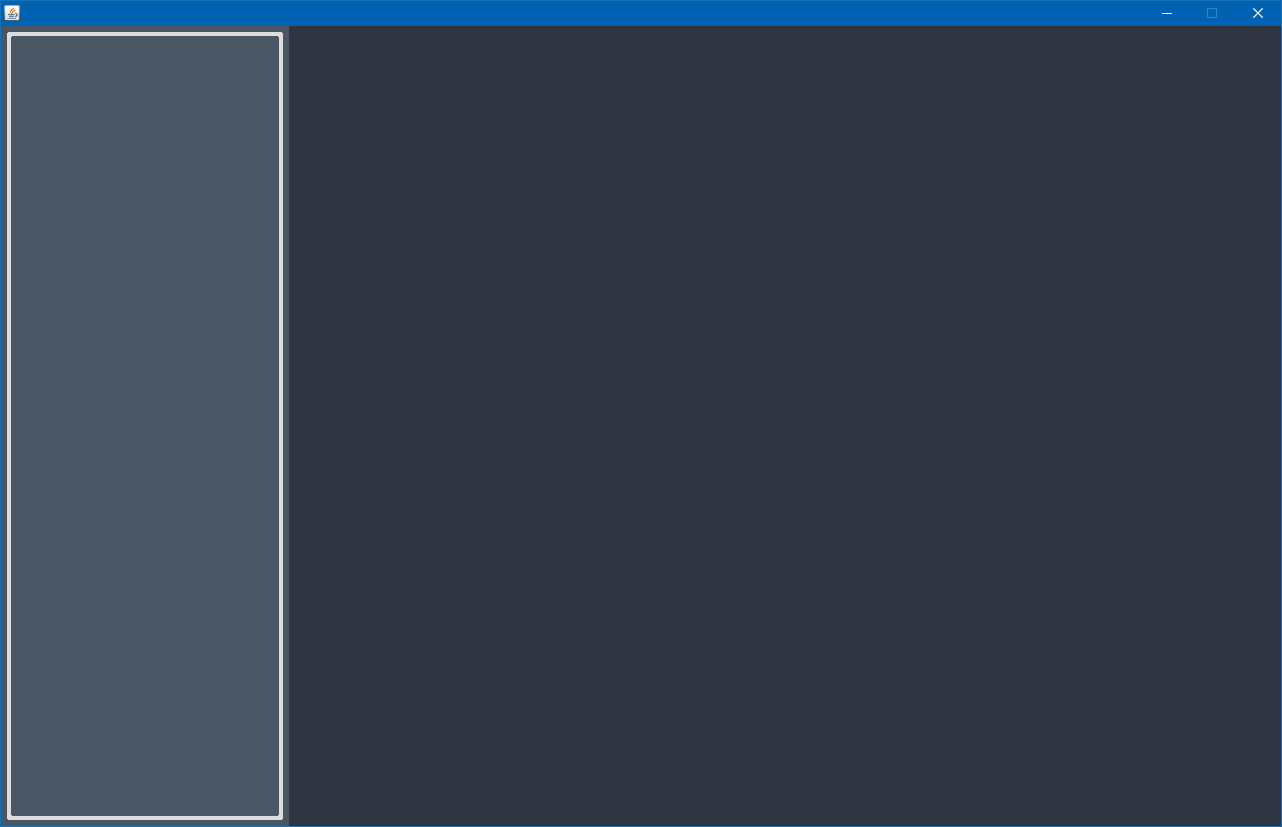
Nice, isn’t it? Now let’s add a LogArea at the bottom as well:
val logArea = Components.logArea()
    .withDecorations(box(title = "Log"))            // 1
    .withSize(WINDOW_WIDTH - SIDEBAR_WIDTH, LOG_AREA_HEIGHT)
    .withAlignmentWithin(screen, BOTTOM_RIGHT)      // 2
    .build()

screen.addComponents(sidebar, logArea)
Let’s take a look at what happens here:
- We wrap our log area in a
boxand set itstitleto"Log". This is another example of using keyword parameters. - We align the log within our
Screento theBOTTOM_RIGHT. We can either align within a component or around a component. In this case we chose the former.
We can also import constant values like WINDOW_WIDTH individually, so we don’t have to qualify them with GameConfig:
import com.example.cavesofzircon.GameConfig.LOG_AREA_HEIGHT
import com.example.cavesofzircon.GameConfig.SIDEBAR_WIDTH
import com.example.cavesofzircon.GameConfig.WINDOW_HEIGHT
import com.example.cavesofzircon.GameConfig.WINDOW_WIDTH
Now, let’s start up and bask in the “warm” colors of our UI:
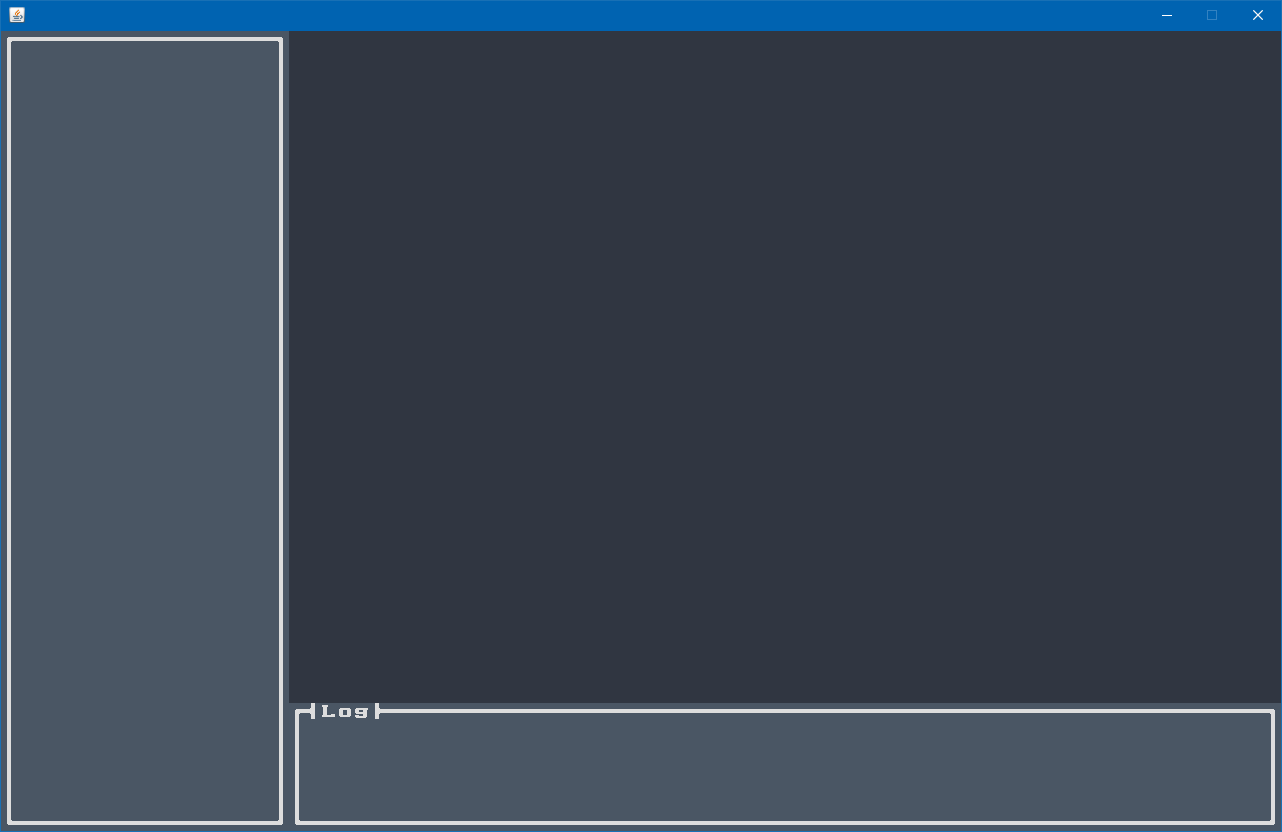
So far so good, right? The problem is that we still don’t see a game so let’s explore how to create one.
The Game Area
Zircon comes with a GameArea. It which holds the in-memory representation of our world. It is not a component, but it can be rendered into one by using a GameAreaRenderer. With this we can choose any component to render our game world into, even Containers, that can hold other components! This means that we can even put components over our game area like here:

As you can see the game area supports top down oblique projection, and simple top down projection. We’ll use the latter in our game.
A game area consists of Blocks which are very similar to blocks in Minecraft. They have 6 sides (top, bottom, left, right, front, back)
and they can also hold internal content. A Block contains Tiles so we can re-use everything
we had so far.
This setup clearly separates the storing of game data from displaying it so we won’t end up with convoluted render logic!
Setting Up the Game
In order to have a game area with generated caves we’re gonna need some plumbing. What I’m talking about is colors, tiles and blocks. It is a good idea to have a separate class for all of these so let’s create a GameColors class where we’ll put all the colors we use in our game:
Using Colors
package com.example.cavesofzircon.builders

import org.hexworks.zircon.api.color.TileColor

object GameColors {
    val WALL_FOREGROUND = TileColor.fromString("#75715E")
    val WALL_BACKGROUND = TileColor.fromString("#3E3D32")

    val FLOOR_FOREGROUND = TileColor.fromString("#75715E")
    val FLOOR_BACKGROUND = TileColor.fromString("#1e2320")
}
objecthere means that there is a single instance ofGameColors, so it is effectively a Singleton. Make sure not to hold shared mutable state in these objects since it will lead to errors.
TileColor is an interface that has a so called factory function for creating new TileColor objects. They can be used to set foreground, and background colors for Tiles. fromString uses the semantics which you might know from CSS: A # followed by 2 digit hexadecimal numbers corresponding to red, green, and blue.
A Factory for Tiles
Another thing we need is an object to hold our Tiles:
package com.example.cavesofzircon.builders

import com.example.cavesofzircon.builders.GameColors.FLOOR_BACKGROUND
import com.example.cavesofzircon.builders.GameColors.FLOOR_FOREGROUND
import com.example.cavesofzircon.builders.GameColors.WALL_BACKGROUND
import com.example.cavesofzircon.builders.GameColors.WALL_FOREGROUND
import org.hexworks.zircon.api.data.CharacterTile
import org.hexworks.zircon.api.data.Tile
import org.hexworks.zircon.api.graphics.Symbols

object GameTileRepository {

    val EMPTY: CharacterTile = Tile.empty()

    val FLOOR: CharacterTile = Tile.newBuilder()
        .withCharacter(Symbols.INTERPUNCT)                  // 1
        .withForegroundColor(FLOOR_FOREGROUND)              // 2
        .withBackgroundColor(FLOOR_BACKGROUND)              // 3
        .buildCharacterTile()                               // 4

    val WALL: CharacterTile = Tile.newBuilder()
        .withCharacter('#')
        .withForegroundColor(WALL_FOREGROUND)
        .withBackgroundColor(WALL_BACKGROUND)
        .buildCharacterTile()

}
This object serves as a Factory which we can use to create
Tile objects. Right now we only have FLOOR and WALL, but we’ll have more later. EMPTY is an empty and transparent Tile.
What we do here is:
- We set a character for our
Tile. You can either type the character (make sure that it is in Code Page 437) or use theSymbolsobject that has shorthands for the supported characters. - We set the foreground color
- And the background color
- And finally build a
CharacterTile. Zircon supports multiple kinds ofTiles (like aGraphicalTilewhich holds textures), but we use character tiles for now.
We call this object GameTileRepository because it holds immutable Tile objects, so it is not a factory. A Tile in
Zircon is immutable, so it can be re-used any number of times throughout the project. This is useful because we can
spare a lot of memory by not creating a lot of new objects.
Creating a Block
If we want to use the GameArea we can use the default Block implementation like this:
Block.newBuilder<Tile>().build()
but in this game we’ll need a custom block implementation because we’ll extend this later to hold our game entities as well, so let’s create a GameBlock:
package com.example.cavesofzircon.blocks

import com.example.cavesofzircon.builders.GameTileRepository.EMPTY
import com.example.cavesofzircon.builders.GameTileRepository.FLOOR
import com.example.cavesofzircon.builders.GameTileRepository.WALL
import kotlinx.collections.immutable.persistentMapOf
import org.hexworks.zircon.api.data.BlockTileType
import org.hexworks.zircon.api.data.Tile
import org.hexworks.zircon.api.data.base.BaseBlock

class GameBlock(content: Tile = FLOOR) : BaseBlock<Tile>(       // 1 // 2
    emptyTile = EMPTY,
    tiles = persistentMapOf(BlockTileType.CONTENT to content)   // 3
) {

    val isFloor: Boolean                                        // 4
        get() = content == FLOOR

    val isWall: Boolean
        get() = content == WALL

}
Here we
- Set the
contentto be afloorby default. What you see in this line is a constructor:GameBlock(content: Tile = FLOOR). In Kotlin constructors are defined this way. We just supply a list of parameters and that’s all. What= GameTileRepository.FLOORdoes is that if you don’t pass acontentas an argument to this constructor, it will use this default value. You can read more about default parameter values here. - We extend
BaseBlock. It takes a generic type parameter (you can read more about the topic here) and we set it toTileindicating that we can use any implementation ofTilehere. Zircon has these base classes for a lot of things includingTiles to make it easier for you to create custom versions. - The possible sides of a block are stoled in the
BlockTileTypeenum. Here we call the parent constructor with acontent“side” pre-filled. - We add two propertyes (
isFloorandisWall) which we can use to check whether a givenBlockis a wall or a floor. The syntax you see here:get() = content == FLOORdefines a getter forisFloorWe can access this value by typingblock.isFloorand whenever it is called it will do the comparison above. If you have programmed in C# this way of defining getters / setters might be familiar, but for those who haven’t seen this before I’d suggest taking a look at the related docs.
Since we already have a repository for Tiles it is straightforward to create a factory for our Blocks as well:
package com.example.cavesofzircon.builders

import com.example.cavesofzircon.blocks.GameBlock

object GameBlockFactory {

    fun floor() = GameBlock(GameTileRepository.FLOOR)

    fun wall() = GameBlock(GameTileRepository.WALL)

}
Generating a dungeon
Now we have all the plumbing in place to start actually generating something. For this we’re gonna need a World! A world object is responsible for holding all our game data like levels, walls, floors, and things like that. For this we are going to create a game area implementation. Luckily GameArea comes with a builder we can use to implement our World:
package com.example.cavesofzircon.world

import com.example.cavesofzircon.blocks.GameBlock
import org.hexworks.zircon.api.builder.game.GameAreaBuilder
import org.hexworks.zircon.api.data.Position3D
import org.hexworks.zircon.api.data.Size3D
import org.hexworks.zircon.api.data.Tile
import org.hexworks.zircon.api.game.GameArea

class World(
    startingBlocks: Map<Position3D, GameBlock>,         // 1
    visibleSize: Size3D,
    actualSize: Size3D
) : GameArea<Tile, GameBlock> by GameAreaBuilder.newBuilder<Tile, GameBlock>() // 2
    .withVisibleSize(visibleSize)                       // 3
    .withActualSize(actualSize)                         // 4
    .build() {

    init {
        startingBlocks.forEach { (pos, block) ->
            setBlockAt(pos, block)                      // 5
        }
    }
}
That funky looking piece of code:
GameArea<Tile, GameBlock> by GameAreaBuilder.newBuilder<Tile, GameBlock>() ...may look confusing to you if you have used Java or Python before. Thebykeyword is used to do delegation. I’ve written a deep-dive on this topic here. The gist of it is that when you implement an interface (GameArea<Tile, GameBlock>) you can choose to use a concrete implementation of that interface instead of implementing all its methods. Here we choose to implementGameAreaby delegating to another instance which we create with theGameAreaBuilder.
This looks a bit complex at first glance but we’ll clear it up:
- A
Worldobject is about holding the world data in memory, but it is not about generating it, so we take the initial state of the world as a parameter. - We implement the
GameAreawhich we’ll use with theGameComponent - We set its
visibleSize. This is the size of the area which will be visible on our screen - We set the
actualSize. This is the size of the whole world which can be multiple times bigger than the visible part.GameAreasupports scrolling so we’ll be able to scroll through our caves soon - a
Worldtakes aMapofGameBlocks, so we need to add them to theGameArea. Where these blocks come from? We’ll see soon enough wen we implement theWorldBuilder!
Now that we have a World which we can use with our GameComponent we are going to need a builder for it.
Our builder will use a cellular automata to generate organic-looking caves. The process is to fill the area with cave floors and walls at random then to smooth everything out by turning areas with mostly neighboring walls into walls and areas with mostly neighboring floors into floors.
Repeat the smoothing process a couple times and you have an interesting mix of cave walls and floors. Before we take a
look at the implementation let’s add an extension function to Position3D.
The
GameAreauses thePosition3Dclass to positionBlocks. aPosition3Dis similar to a simplePositionbut it not only hasxandycoordinates, but also azlevel. When we generate our world it won’t be a flat 2D one, but one in 3 dimensions!
Exploring extension functions
There are instances when you want to add something to an existing class, but you can’t modify it for some reason. When you are using a library written by someone else this is the case most of the time. For example we can’t touch Position3D because it comes from Zircon. In Java this is where you can use the Decorator pattern. Luckily Kotlin makes this a lot easier by allowing us to define extensions instead. For our WorldBuilder we want an extension function on Position3D which returns the positions around it on the same level. Let’s create a new file called PositionExtensions.kt and add this to it:
package com.example.cavesofzircon.extensions

import org.hexworks.zircon.api.data.Position3D

fun Position3D.sameLevelNeighborsShuffled(): List<Position3D> { // 1
    return (-1..1).flatMap { x ->
        (-1..1).map { y ->                                      // 2
            this.withRelativeX(x).withRelativeY(y)              // 3
        }
    }.minus(this).shuffled()                                    // 4
}
Putting extensions for a class
Xto a file calledXExtensions.ktis the idiomatic way of defining extensions.
This is only a few lines of code but it introduces some concepts which we don’t know yet:
- We add the extension function to
Position3D. We do it by defining a function not with a simple name, but by the format:fun <target class>.<function name>: return type { // .... You can read more about extensions here. - We use functional programming here.
flatMapandmapworks in a similar way as you might got used to it in Java 8’s Stream API. Take a look at the difference here. - When you write extension functions
thiswill be bound to the class being extended. Sothishere will point to thePosition3Dinstance on whichsameLevelNeighborsShuffledis called. minushere will removethisposition from theListand return a newList.shuffledwill also return a new list which contains the same elements but shuffled.
Armed with this extension function we can now implement the builder itself:
package com.example.cavesofzircon.builders

import com.example.cavesofzircon.blocks.GameBlock
import com.example.cavesofzircon.extensions.sameLevelNeighborsShuffled
import com.example.cavesofzircon.world.World
import org.hexworks.zircon.api.data.Position3D
import org.hexworks.zircon.api.data.Size3D

class WorldBuilder(private val worldSize: Size3D) {                         // 1

    private val width = worldSize.xLength
    private val height = worldSize.zLength
    private var blocks: MutableMap<Position3D, GameBlock> = mutableMapOf()  // 2

    fun makeCaves(): WorldBuilder {                                         // 3
        return randomizeTiles()
            .smooth(8)
    }

    fun build(visibleSize: Size3D): World = World(blocks, visibleSize, worldSize) // 4

    private fun randomizeTiles(): WorldBuilder {
        forAllPositions { pos ->
            blocks[pos] = if (Math.random() < 0.5) {                        // 5
                GameBlockFactory.floor()
            } else GameBlockFactory.wall()
        }
        return this
    }

    private fun smooth(iterations: Int): WorldBuilder {
        val newBlocks = mutableMapOf<Position3D, GameBlock>()               // 6
        repeat(iterations) {
            forAllPositions { pos ->
                val (x, y, z) = pos                                         // 7
                var floors = 0
                var rocks = 0
                pos.sameLevelNeighborsShuffled().plus(pos).forEach { neighbor -> // 8
                    blocks.whenPresent(neighbor) { block ->                 // 9
                        if (block.isFloor) {
                            floors++
                        } else rocks++
                    }
                }
                newBlocks[Position3D.create(x, y, z)] =
                    if (floors >= rocks) GameBlockFactory.floor() else GameBlockFactory.wall()
            }
            blocks = newBlocks                                              // 10
        }
        return this
    }

    private fun forAllPositions(fn: (Position3D) -> Unit) {                 // 11
        worldSize.fetchPositions().forEach(fn)
    }

    private fun MutableMap<Position3D, GameBlock>.whenPresent(pos: Position3D, fn: (GameBlock) -> Unit) { // 12
        this[pos]?.let(fn)
    }
}
This might be the most complex piece of code we’ve written so far but the whole class still fits on the screen so it might be easier to understand than it looks. Let’s see:
- We take the
worldSizefrom the outside world. This is useful because later it can be parameterized. - We maintain a
MapofBlocks which we will use when webuildtheWorld - With
makeCaveswe create a fluent interface so that the users ofWorldBuildercan use it in a similar manner as we buildTiles andComponents in Zircon. - When we
buildtheWorldwe take a visible size which will be used by theGameArea. - In Kotlin
ifis not a statement but an expression. This means that it returns a value so we can assign it to ourMap. - We are going to need a new
Mapof blocks for our smoothing because we can’t do it in place. Modifying the originalMapwould render our cellular automata algorithm useless because it needs to calculate the new state from the old state. - We create a 3D world, so we need not only
xandy, but alsoz. What you see here is called destructuring. If you are not familiar with the concept, take a look at the docs here. - Here we iterate over a list of the current position and all its neighbors
- And we only care about the positions which have a corresponding block (whey are not outside of the game world)
- When we’re done with smoothing we replace the old
Mapwith the new one. - This is just a convenience function for iterating over all of the world’s positions which I added as a demonstration
of how functions with lambdas work. Here you can pass any
function which takes a
Position3Dand returnsUnit(Unitis the equivalent of Java’sVoid). - This function is an example of defining an extension function which takes a function as a parameter.
What the header of the function means here is:
Augment all
MutableMaps which are holdingPosition3DtoGameBlockmappings to have a function named “whenPresent” which takes a position and a function.That’s right. This function will only be available on any
MutableMapwhich has these generic type parameters. So this is in fact a form of polymorphism. We’ll use this feature of Kotlin in the coming articles so I wanted to put an useful example here so we can get familiar with the concept.
Putting it together
Now all is left to do is to add a Game class which will hold all our game-specific data and can be passed around
in our application as a form of Context Object:
package com.example.cavesofzircon.world

import com.example.cavesofzircon.GameConfig.GAME_AREA_SIZE
import com.example.cavesofzircon.GameConfig.WORLD_SIZE
import com.example.cavesofzircon.builders.WorldBuilder
import org.hexworks.zircon.api.data.Size3D

class Game(val world: World) {

    companion object {

        fun create(
            worldSize: Size3D = WORLD_SIZE,
            visibleSize: Size3D = GAME_AREA_SIZE
        ) = Game(
            WorldBuilder(worldSize)
                .makeCaves()
                .build(visibleSize)
        )
    }
}
Now with this code we can call Game.create() and we’ll get a Game object which contains a fully generated
World! Let’s wire this together with our Views. First we need to Modify PlayView to take a Game object
as a constructor parameter:
// don't forget to import it!
class PlayView(
    private val grid: TileGrid,
    private val game: Game = Game.create(),
    theme: ColorTheme = GameConfig.THEME
) : BaseView(grid, theme) {
Note that constructors can also have default values for their parameters. With this change we say that “okay, take
a Game object as a constructor parameter, but if none is supplied, then just call Game.create() instead”. With
this change we didn’t break our existing code which is very useful in the long run!
Now to conclude coding for today we add the game area to the PlayView to display our generated caves:
val gameComponent = Components.panel()
    .withSize(game.world.visibleSize.to2DSize())    // 1
    .withComponentRenderer(
        GameAreaComponentRenderer(                  // 2
            gameArea = game.world,
            projectionMode = TOP_DOWN.toProperty(), // 3
            fillerTile = GameTileRepository.FLOOR   // 4
        )
    )
    .withAlignmentWithin(screen, TOP_RIGHT)
    .build()

screen.addComponents(sidebar, logArea, gameComponent)
Also don’t forget to import the newly added things:
import org.hexworks.cobalt.databinding.api.extension.toProperty
import org.hexworks.zircon.api.game.ProjectionMode.TOP_DOWN
import org.hexworks.zircon.internal.game.impl.GameAreaComponentRenderer
What this code does is:
- We create a panel with the visible size of the game area
- We set its renderer to be the game area renderer
- Set the projection mode to top down
- And a “filler” tile to the FLOOR tile. The filler is used when there is no other tile to display. This won’t happen for us, but it is mandatory because it can happen.
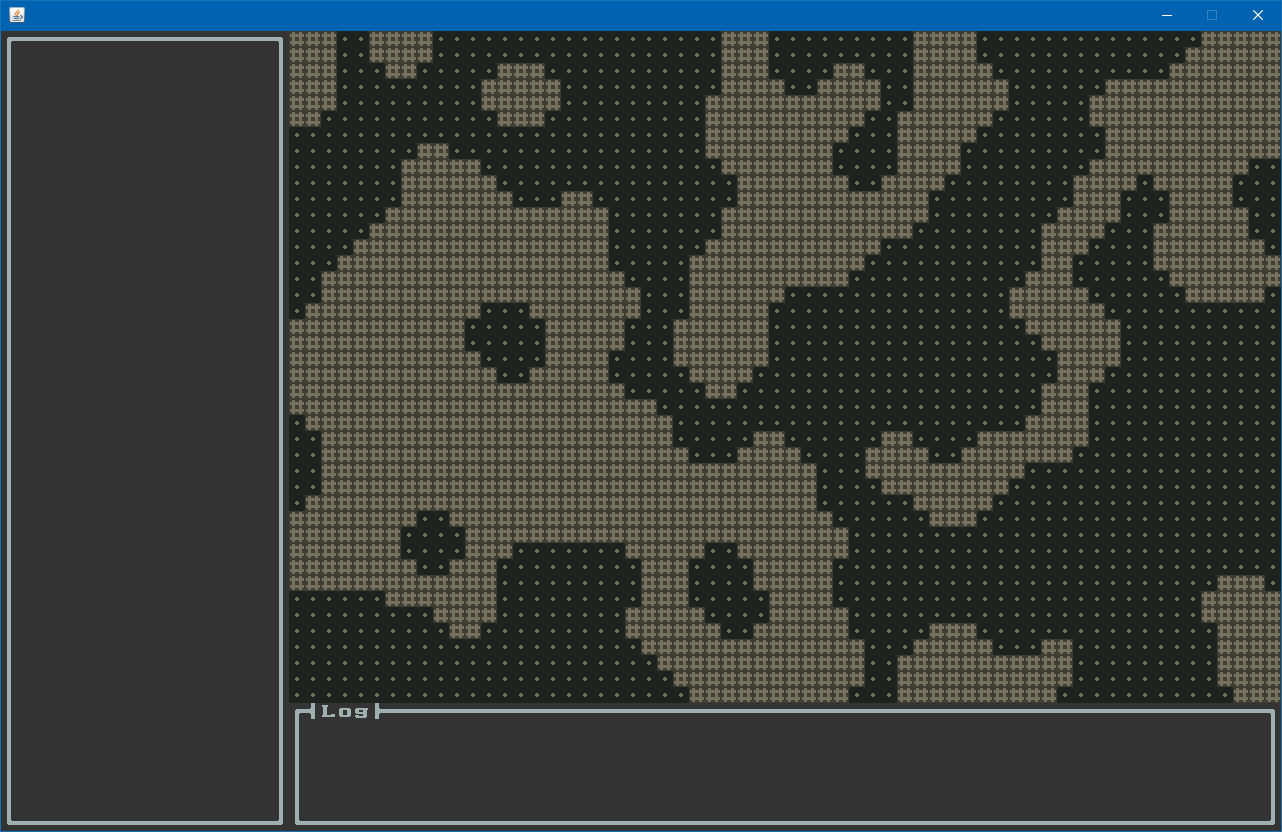
This is the result:
Conclusion
Congratulations! We’ve worked hard and managed to create the World where all things will happen in our game!
This is the first step to have something which is not only looking nice but also fun to play with. So in the next
article we’ll add a player to our dungeon with which we can explore it.
Until then go forth and kode on!
The code of this article can be found in commit #3.